Would I do it again?

Posted April 29, 2013 by rhamje
Categories: Uncategorized

It has been quite a while since I completed this project. While the Fastback is running just fine, I am sometimes asked if I would do a project like this again.  The short answer is “No”.

Last summer I took an opportunity to buy a new Think City EV for a great price.  It is a wonderful little car.  And when I consider all the other options like the Nissan Leaf and Smart Electric, I have come to believe that the days of the hobbyist EV conversion are numbered.  Here is my comparison of a new EV versus converting an older car to electric drive:

NEW CAR advantages:

1. Lower cost than conversion (now 50% less in some cases)

2. Financing available

3. Latest safety features

4. Warranty, and dealer service

5. No “old car” issues like body rust, failing parts, etc. I’ve personally had almost none of this, but it could happen any time.

6. Resale market

7. More usable space, greater overall utility

8. Instant gratificaiton – write a check today and drive it today

CONVERSION advantages:

1. Lower environmental impact (re-use)

2. Finished product is unique

3. If you start with a cool old car, you have an even cooler EV

4. Learning opportunity

Since I started my project, the market has changed dramatically.  There are many choices in new EV’s now and the price continues to fall.  Meanwhile, the hobbyist market has not seen comparable price declines.  The batteries, motors, controllers and BMS’s that are available to a home builder have not changed much in features or cost. Nor do I expect this to change – the big manufacturers have the economies of scale that no hobbyist can match.

The bottom line?  If you are looking for a quality EV for transportation, go to your local Nissan or Smart or Mitsubishi or Ford dealer.  If you are want to make a statement or take on a challenge, and have the money to spend and patience to match, then a conversion still makes sense. Essentially, the EV conversion now resembles the ICE kit car – a labor of love undertaken by few.

When I started my project, there was no mid-market “store-bought” EV option.  The few available were either crap (think Zap Xebra) or six-figure expensive (Tesla Roadster). How much has changed!
First maintenance

Posted November 16, 2011 by rhamje
Categories: The Project Log

This week I had to perform the first maintenance on the Fastback in more than a year of driving. The shifter linkage separated from the transmission, leaving me unable to put the car in gear. The car had to be towed, but the repair was quickly done by Scott Rife of Rife Motors (the best VW man in Portland!).

I wasn’t too happy being stranded and stuck with a towing bill. But it was gratifying to realize that the first work of any kind in a year was unrelated to the conversion itself. Still no repairs on the electrical bits, so everything is holding together well.

Heat!

Posted November 30, 2010 by rhamje
Categories: The Project Log

This past weekend I installed a 1500 watt heater in the Fastback.  Last night we tried it out on a rainy night and it worked great!  Instant heat.  I’ve got it plumbed into the defroster ducts at the moment, since seeing where you’re going is a priority.  I may later add some ducting so it will warm the passengers as well.

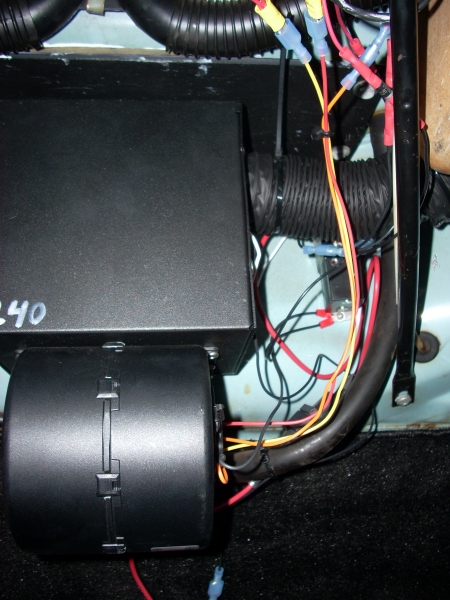
In most EV conversions, the heater core is replaced with a ceramic heating element and everything else is left stock.  Since older VW’s don’t have heater cores, a complete heater is needed.  Fortunately, Canadian EV offers just such a thing and they are a great company to do business with.  Here is a photo of the installed unit.

Heater installed

The black box with “240” written on it is the heater itself, with a fan housing below it.  You can see one of the two ducts on the right, going to the defroster tube.  There is a contactor behind that tube – this is a switch that turns on the 288 volt power supply when the heater switch is flipped.  By using a contactor wired into the heater fan switch, there is no risk of creating heat without air movement, which could cause a fire.  The orange, yellow and red wires are for the various fan speeds – they go to the dashboard switch.

The entire unit is mounted to the front cab wall beneath the dash.  In the Fastback, this spot is occupied by a fresh air blower which I removed.  The fresh air inlet is now covered with a piece of ABS plastic which I cut to match the profile of the removed blower housing.  A rubber seal is caulked in place to prevent any water from getting in.  It all works fine – we’ve had a lot of rain lately and everything is dry.

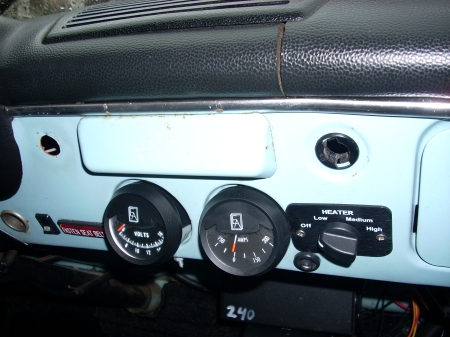
The heater is controlled with one switch which I mounted in a hole where the fresh air controls once sat.

Dash with Heater Switch

The entire job took about four hours, including removing the fresh air blower.

My conversion project is essentially done.  There is still some BMS work needed, but I have been able to successfully charge and balance the batteries without the BMS.  I still want to get it working right, but at least the car is a reliable all-weather driver now.


Finishing touches

Posted September 5, 2010 by rhamje
Categories: The Project Log

This weekend I finished up the last remaining battery box.  No more battery work (yeah!).  All 30 cells in the front pack now report to the BMS and have a full charge.  This took about four hours of work.

Three of the batteries in the front pack were dead and had to be replaced.  This meant removing the battery box which was pretty simple.  Two of the dead cells were at the end of a row, so it was easy to tap the whole row out, replace the two bad ones and tap all three back in as a block.  The other end with one bad cell wasn’t so simple.  As I was pounding it out, the casing cracked and the fluid leaked out.  Fortunately, LiFePO4 batteries aren’t particularly poisonous and don’t contain acid, and the actual lithium package inside did not leak.  Once the pack was complete, I then had to wire and test the BMS boards.  Twenty-six had been working already, so it was fairly straightforward to insert four more.  Everything worked!

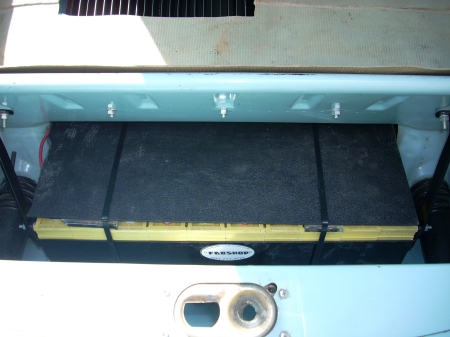
Last step was to fabricate the plastic cover and then re-insert the battery box.  This proved to be fairly awkward, but I did finally get it done.  Here is how the finished product looks:

Front Box with Cover

Next thing to do was fix the rattling shifter.  The rattle was caused by a $3 plastic bushing on the shift rod that was broken in half.  This let the metal shift rod bang against the metal guide, making quite a racket.  It took me almost five hours of incredibly dirty and frustrating work to remove the shifter, take off the broken bushing, replace it, and re-install the shift rod.  VW mechanics sure earn their money if they have to do this job often!

This morning, I reconnected everything and we drove off with a full charge on 90 working batteries, and a nice quiet shifter!

Two things remain and the car will be 100% finished: BMS troubleshooting (one of the rear banks is reporting a fault) and installing a heater.  I can also mess around trying to make a Bluetooth connection from the BMS to my Droid phone – but that’s just for grins.  So close…

Another Expensive Education

Posted August 29, 2010 by rhamje
Categories: The Project Log

Yesterday, I learned more precisely how much range the Fastback has.  We had to take a no-notice trip to Beaverton, about 12 miles including a big uphill section.  Halfway up the hill, the controller went into “limp-home” mode and our speed dropped to about 20 mph.  A brief stop allowed the batteries to recover a little and we made it to our destination.  At that point, the car had been driven 72 miles, about half of it freeway driving, and there was essentially nothing left.  So – it’s official that the Fastback has a range of 72 miles with a mix of freeway, hill climbing and around-town driving.  I am pretty certain that it will do 100 miles+ of in-town driving.  This isn’t too bad really – the Nissan Leaf has similar capability and the Chevy Volt about half that.  It’s also better than my original expectation when I started the conversion.

My plan was to recharge in Beaverton for the drive home.  I was more than a little miffed to arrive at the much-ballyhooed charging station in downtown Beaverton, only to find that it is shut off!  So I then tried a battery store and two car dealers, but none of them had a 20 amp 115VAC outlet.  In the end, I had to call a tow truck, which took over three hours to arrive.  Not my favorite day last week.

The Beaverton charging station is on the street between the library and the farmer’s market.  It has a reserved parking space for electric cars to charge, which of course was occupied by an SUV when I arrived.  An angry-looking woman eventually got in the SUV and drove off – she struck me as the type who is always angry-looking, but maybe that was my bias.  In any case, I then parked and discovered that the station is shut off.  While I was pondering what to do, an old guy on a scooter came by and bitched at me that if the city was providing free electricity for me, they should give him free gas.  I explained that #1, the city wasn’t providing anything for me at that moment, and #2, the electric box has a credit-card swiper on it so is presumably not free, and #3, the box is operated by a private company (based in Beaverton), not by the city which had only provided a place for it.  He was unconvinced, but I sure felt unwelcome.  I once lived in Beaverton; it’s almost embarrassing when the residents are so obnoxious and ignorant.  There was one high point – the SUV got ticketed for illegal parking.

Enough ranting. The Fastback was towed home without incident and the batteries do not appear to have been damaged by discharging.  The controller has logic in it to prevent total battery discharge, and it works.   So that test has been passed.  In the future, I will try to keep a full charge on the pack all the time; going 25 on the freeway and being towed home is no fun.

Buttoning Up

Posted July 25, 2010 by rhamje
Categories: The Project Log

This past week I completed the rear portion of the Fastback.  The BMS is fully functional for the back 60 batteries and the battery covers are  installed.  All that remains is replacing three dead cells in the front bank and installing that cover.  Then the project will be finished!  Except for a heater.

I took photos of the finished portions so you can see how it looks in the end.  First, the wiring under the back seat:

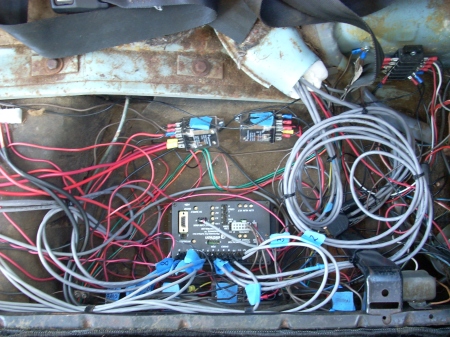
Wiring under back seat - driver's side

This rat’s nest is wiring for the BMS and control relays.  It actually looks a lot nicer now than a few days ago, as I coiled and tied down everything.  In the center is the BMS controller with 12 wires to the battery banks and one wire to the current detector, plus six wires for control (2 power, 2 ground, 1 for charger shutoff and 1 for motor shutoff).  At the top, bottom and right sides are the control relays.  These include two original relays for turn signals and brake lights, plus six others for the EV function (2 for charger interlock to prevent driving with the car plugged in, 1 for the key switch which starts everything when you turn the key, 1 for regeneration which turns the brake lights on while regenerating even without using the brakes, 1 for BMS charger interlock and 1 for BMS motor controller interface which turns the motor off if the batteries are being over-discharged).

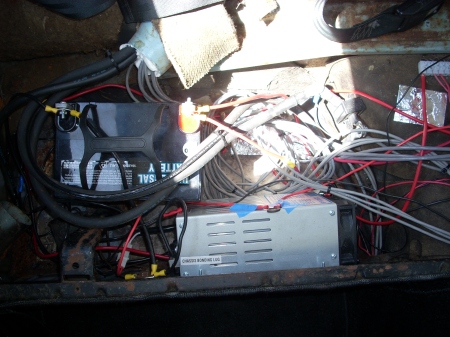
Back seat wiring - passenger side

The other wiring is under the passenger side, shown above.  Here we have the small 12 volt battery to the left and the current detector to the right h(ard to see – sorry).  At the bottom is the DC/DC converter.  Not visible is a small relay for which kicks up the DC output to 14.3 volts when driving so the headlights don’t get dim.  To the upper right is a white bar – this is the 12 volt distribution block.  In both pictures you can see wiring coming through the original heater ducts, and maybe you can make out the foam I sprayed in there to seal it up.  This cut down the road noise dramatically.  The foam is standard window insulation, but the type that won’t make toxic fumes if burned (DAP Tex-Plus).

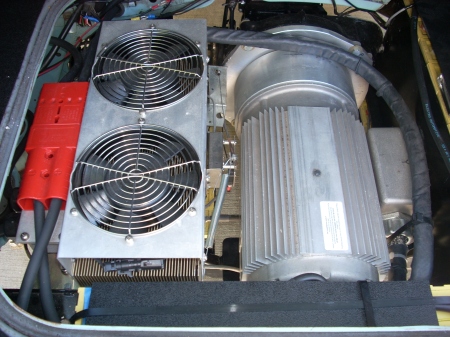
Engine Compartment - Driver's Side

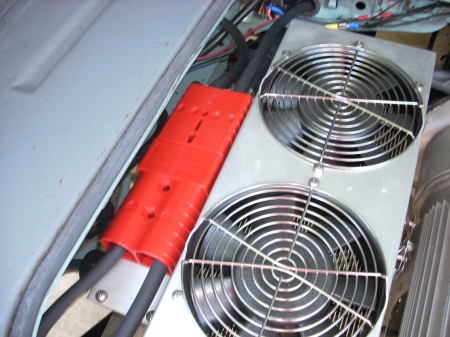
Here is the motor, controller and rear-most battery bank, with a cover on it.  The red block is the service disconnect mentioned in an earlier posting.  The throttle cable and spring are visible to the right of the controller.

Engine Compartment - Passenger Side

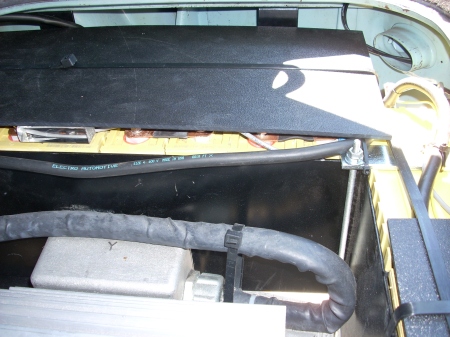
The right-hand upper battery bank contains 18 batteries.  There is now a plastic cover over it to protect against dropped tools, etc.  To the right is the rear-most bank with its cover.  This bank has six batteries.  Two of them died due to bad wiring of the BMS.  I could not remove them, so simply added two more batteries and wired around the dead ones.  Better to carry around an extra 11 pounds of dead weight than spend 8+ hours dismantling the car to get them out.  The two replacements are laying on their side with the terminals facing away.  It turned out to be pretty simple to get them in there and wired.  LiFePO4 batteries can be mounted in any orientation, which made this possible.

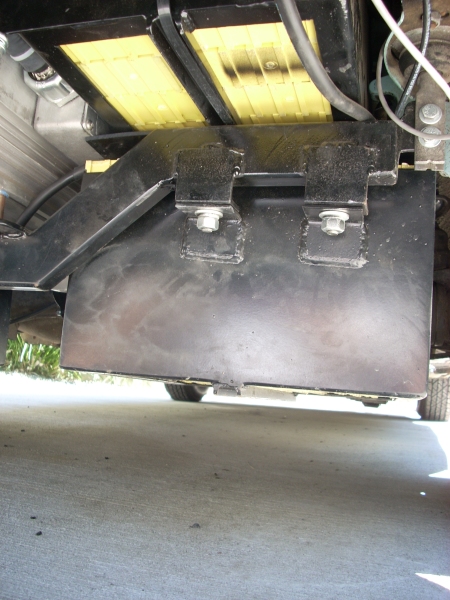
Lower Battery Box - Passenger Side

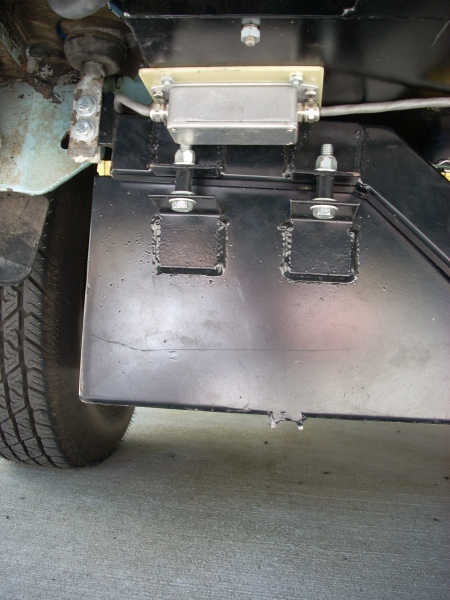
Lower Battery Box - Driver's Side

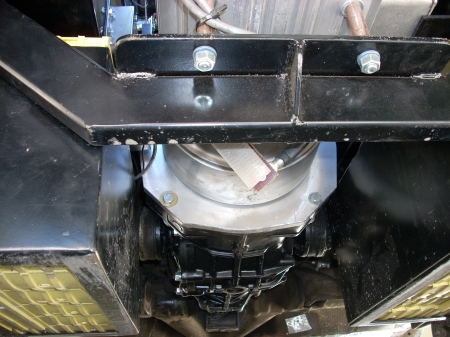
Motor Mount and Transaxle

The three pictures above show the underside of the rear-end as finally installed.

One more battery box to go and it’s done!  On the cost front, I have spent another $1,550 buying replacement boards for the BMS and cells that the BMS destroyed.  And another $100 for professional assistance with the last wiring issues.  This brings the total for the EV portion to almost exactly $30,000 before tax credits.

Public Debut…and more lessons learned

Posted July 13, 2010 by rhamje
Categories: The Project Log

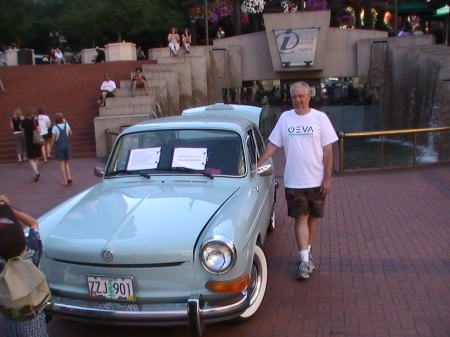
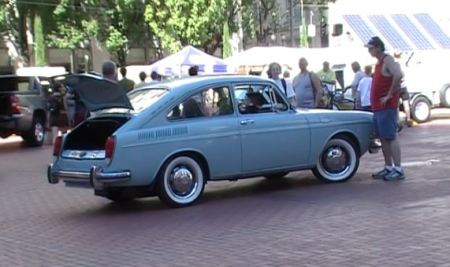
On Saturday, July 10 was the Portland EV Awareness Day at Pioneer Square in the heart of Portland.  I took the Fastback and showed it to the world.  There were lots of cool cars to see, but still many people stopped and asked about our car.  One of the OEVA (Oregon Electric Vehicle Association) members took a bunch of pictures: http://www.flickr.com/photos/darkstarpdx/sets/72157624467961958/.  It was a hot sunny day and I wish I’d worn sunscreen and a hat…

I cleaned the car really carefully (with a toothbrush in spots) and put a nice wax on it so it would look pretty.  Jeanette came by and took some pictures.

At the OEVA Show

At the OEVA Show

I also got to take a close look at the other conversion that people had done, and talk to them about their experiences.  I learned a few things about how to properly mount batteries, and other sources for parts and systems.

My design for the battery boxes has a few flaws.  If you are considering a conversion, please think hard about access to the components after installation.  In my case, I should have done two major things differently.

Mount the batteries on shelves, not in boxes.  The batteries come with clamps for locking them into compressed blocks.  I tossed these and put the batteries into boxes instead.  In hindsight, this was dumb because: (1) it’s very hard to get a single battery out; (2) it forces you to do your battery wiring with the batteries in the boxes; and (3) the boxes are heavy.  What I should have done was use shelves with a 1″ lip.  I then could have bound the batteries into blocks of four or five and simply dropped them onto the shelves once they were wired.  A simple hold-down bracket would complete the job.

Use a modular design. In the upper rear engine compartment, my design has one big box/shelf combination that holds 24 batteries and the controller.  I should have designed this as three smaller units.  Having it in one piece caused two big issues: (1) I cannot work on a drive-train component such as the clutch or transmission without removing the entire rear setup; (2) that single piece is so heavy that I cannot easily handle it.  To give an example, to replace one battery in my rear-most bank, I would have to remove all the rear battery boxes, the motor mount, the motor and transmission (as a unit) and the motor controller – and then pull out the very heavy one-piece box/shelf combination.  This would literally take all day, involve using several jacks, and risk damaging things that are working fine.  It’s such a daunting task that I might rather leave a bad battery installed and simply wire around it.

When you design your conversion, keep everything small and manageable.  Your design should allow you to remove any battery block without removing anything else.  If no more than five batteries are treated as single unit, your heaviest component will be only 40 pounds.  If it’s easy to access the motor, you’ll then be able to work on your clutch without disassembling half the car.  Trust me – you’ll be glad.

As an update, my replacement BMS components have arrived.  With luck, I may be able to complete the installation next weekend.

Lessons Learned

Posted June 13, 2010 by rhamje
Categories: The Project Log

Even though I am not completely finished with my conversion, I promised to share the lessons I have learned from it.  There may be more later as I get used to the car, have maintenance and warranty issues, etc.   But for now, my dos and don’ts of EV conversion:

  1. DO Use a high-voltage power pack. You get better range and performance, and it’s safer to work with (less amperage).  The only downside is the cost of having lots of batteries.
  2. DO Use lithium batteries. Better in every way, and they aren’t even more expensive if you plan to drive the car for more than 3-4 years.
  3. DO Use AC drive. Simpler installation, fewer parts, braking regeneration (which works very nicely by the way), better performance.
  4. DO Hire professionals for the work you can’t competently do yourself.  For me this was gasoline engine removal, welding, transmission repair and BMS troubleshooting.
  5. DO Get involved in the EV community, and the one for your make of car.  There are forums everywhere online, full of people in the EV world who are very helpful.  Same goes for the VW Type 3 folks.  But almost any make of car has enthusiasts who can help you.  And they want to help, so ask.
  6. DO Deal locally wherever possible.  I have had the best results working with people in town – the welding folks, mechanics, etc.  And the worst results dealing with anonymous websites far away.  For example, if I’d not been able to drive to my supplier to get the proper batteries (after two mis-shipments), the project would have been delayed at least another month.
  7. DO Buy tools if you need them.  Or rent. Or borrow.   Using the wrong tools is dangerous and yields bad results.  I hurt myself several times because I had the wrong jack, a lousy soldering iron, etc.  If you can’t bring yourself to buy tools, see #4 above.
  8. DO Be prepared for delays and frustrations. When you are making something one-of-a-kind, there will always be problems.  Things take longer than it seems they should, everything costs more than you hope, parts are hard to find or make.  In my case, my five month project has turned out to be most of a year.
  9. DO Get a garage. Working in the driveway has really slowed me down.  I’ve had long delays for bad weather.  I have to put my tools away in the house after every work session.  I was storing large components in the laundry room.  My neighbors’ patience was tested.  The good thing about working outdoors is chatting with all the folks who walk by and wonder what’s going on.
  10. DO Buy reference guides. My Bentley VW manual and the “Convert It” book by Mike Brown have been indispensable.
  1. DON’T Buy a kit. There are no complete kits on the market.  There are really only six main elements in the conversion and you can buy them separately for less (and get the best of each for your job).  The components are: motor and controller; batteries and BMS; charger; DC/DC converter; accelerator POT unit; and transmission adapter.  The minor components such as wire, connectors and relays are easily bought from an electronic supply house like Digikey or Mouser.  Gauges and the switchbox can be bought from an EV or general automotive supplier.
  2. DON’T Pay up front. For major components, use an escrow service like PayPal which pays the vendor when your stuff ships.  Two of my suppliers went out of business on me, one still owing me stuff.  If they won’t accept escrow, break up your bill of materials into small orders and pay each separately with a credit card – at least you can get your money back if they don’t deliver.  I’d suggest no single order of more than $2,000.  If your supplier folds, quickly contact the original manufacturer so they know what happened and can help you with warranty claims.
  3. DON’T Buy things you don’t understand. In my case, the BMS has been the most trouble.  It is far more complicated and sensitive than I expected.  I should have asked other people who had one before I bought it – I might have picked a different system if I had.
  4. DON’T Deal with Electro Automotive. This company is (was) the oldest in the business and has sold thousands of kits for conversions.   But their customer service is atrocious and they may now be out of business.  They don’t sell anything you can’t find elsewhere.
  5. DON’T Use welding cable. With lower voltage DC systems, welding cable is recommended to carry the high amperage.  With a high-voltage system, you don’t need it.  Welding cable is hard to work with, the lugs are difficult to connect to the other components, the wire is bulky and hard to thread through the car, and it’s expensive.  Use 8 gauge insulated wire instead – you can buy it anywhere.  If for some reason I had to rewire my car, I would toss all the welding cable.
  6. DON’T Cut corners on safety. This is a motor vehicle that carries human beings at high speeds.  You don’t want your battery boxes falling out, your flywheel disintegrating, your 12 volt power suddenly failing, you (or your passengers, or your neighbor’s cat) getting shocked, etc.  Insulate all your connections, cover your batteries, tape your tools, use heavy automotive-grade nuts and bolts, get your flywheel balanced, make sure your brakes and suspension are strong enough for the heavier car.  If in doubt, use a bigger bolt, or thicker metal, or fatter wire.  Use lock washers on every bolt.
  7. DON’T Sell your other car too soon. You will be running lots of little errands for this and that.  It’s nice to have your other car for this – sell it once your EV is a daily driver.  I rang up a pretty hefty bill with Zipcar.  But you can’t easily haul your motor or transmission to a shop on a bicycle or the bus.
  8. DON’T Buy a junker car to convert. I’ve been very happy that the car I started with was so nice.  Everything basically worked, the body is in good shape, etc.  Worst would be a donor car with electrical problems.  Converting to electric is hard enough without fighting problems with the basic running gear at the same time.

That’s it for now.  But who knows what the future holds?  Painful and expensive lessons are always lurking in most things in life…

Power play

Posted June 13, 2010 by rhamje
Categories: The Project Log

I gave up on Electro Automotive and purchased a DC/DC converter from another company.  It arrived in just a few days.  On my first attempt to install it, I received a big shock, literally.  After connecting the unit, when I attempted to reconnect the main power a huge arc jumped from the wire to the battery.  I jumped almost as far.  No damage done; just a scare.  When I called the supplier they said, “oh yeah – we forgo0t to tell you about that.  You need thermistors.”  So a couple of thermistors are on the way and I can complete the installation when they get here.

As I understand it, the DC/DC converter wants to draw a huge charge right away to power up its capacitors.  The unit doesn’t have an on/off switch, so the draw happens as soon as power is applied.  Adding thermistors is supposed to help.  These little devices (they cost only $1.38) will absorb the initial draw, converting it to heat.  Instead of a big spark, the thermistors get really hot.  Once the unit is fully powered, the thermistors cool off and everything is normal.

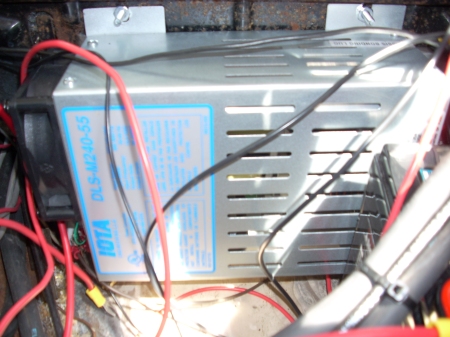
I did all the wiring and installation of the DC/DC converter, leaving two open connections for the thermistors. The box is under the back seat next to the battery.   This is what it looks like:

DC/DC Converter

The battery is to the right.  The connections for this unit are pretty straightforward.  It took me about an hour to get it all done once the sparking issue was figured out.  This is the last major component in my conversion.  All that’s left is buttoning everything up and making it pretty (and getting the darned BMS to work properly).

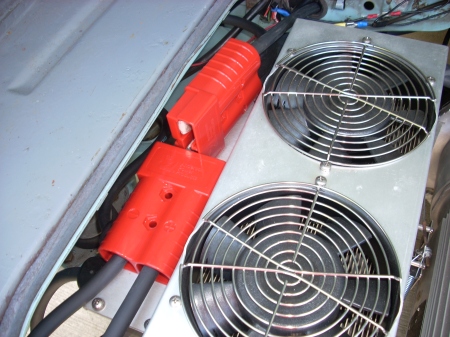
I have gotten tired of getting little shocks every time I disconnect the main power to work on something.  So I added a service disconnect.  This is two large plastic blocks, called Anderson connectors, that snap together like giant Legos.  I cut the main positive and negative wires in the engine compartment and inserted this connector in between.  Now it’s a tool-less and shock-less process to disconnect everything.

Service Disconnect, Disconnected

Service Disconnect, Ready to Drive

This is a good safety measure also – if the car gets wrecked there is a fairly obvious way to shut off the power.

Basic Statistics on the Conversion

Posted May 24, 2010 by rhamje
Categories: The Project Log

The electric Fastback performs pretty decently.  I was finally able to get it out on the highway and see what it can do.  Top speed on the level is about 60 mph, although I might be able to get a bit more out of it if I pushed really hard.  I haven’t timed a 0-60 acceleration, but it does just fine keeping up with everyone else.

Approximate top speed by gear:

1st = 20 mph with very quick acceleration

2nd = 40 mph with good acceleration up to about 35 mph.  This gear will move the car from a stop at a normal pace.

3rd = 55 mph (maybe more) with decent power.  The car will move from a standing start in 3rd gear, but very slowly until about 20 mph.

4th = 60 mph with very little power (this is a cruising gear with almost no amperage draw, but can’t pull up a hill).

I charged up the car for the first time.  The charger added 28 volts in one hour, which means that a full charge will take a bit less than four hours.  Driving hard on the freeway in “power” mode for 10 miles drew down 32 volts.  From this, I am guessing that the car has about a 30 mile range for high-speed freeway driving.  In-town driving is much easier on the batteries.  I estimate that it can go almost 100 miles on a charge with light acceleration and top speeds under 35 mph.

As promised, I have added up the cost of the conversion.  I’m not 100% finished yet, so there will be a few more small things like carpeting and maybe some more BMS components.  None of this should be very expensive, so this chart is a pretty fair representation.  I separated the items that are not strictly part of the conversion, like new tires.

Pay to: Description Reqrd? Amount
Spirondon Banos Purchase 1973 Fastback Y $2,900
Rife Motors Remove gasoline engine, fix brakes Y $843
EV Components Batteries, BMS Y $9,034
Electro Automotive Conversion Kit Y $10,025
Fab Shop Fabrication work (includes towing) Y $4,432
Integrity Towing Tow to Fab Shop (1st tow) Y $93
Halsey Import Parts Clutch alignment tool Y $2
NAPA Tool for drive shaft attachment Y $7
RechargeCar Safety power disconnect Y $143
Northwest Battery 12v battery Y $76
Gilbertson Machine Balance flywheel and clutch Y $150
Travis Travelstead Consulting on BMS Y $300
EV Parts “Electric” logo Y $9
Oergon Electric Group Wiring 240v AC outlet for charging Y $575
Schucks Auto Supply Misc parts and tools Y $61
Cableties Inc. Cable ties for battery box covers Y $30
Evolve Inc Replacement BMS boards Y $132
Digikey Extra Molex for BMS Y $30
Winks Hardware Misc parts and tools Y $13
TAP Plastics Battery box covers Y $101
Subtotal $28,956
Chuck Volks Werks Regear transaxle N $525
Peter Parker Sale of gasoline engine N -$240
AGS Auto Glass Replace windshield N $300
MotorSpot Radial whitewall tires N $709
Progressive Insurance 6 months full coverage N $1,067
State of Oregon Title and registration N $235
Les Schwab Tire mount and balance N $107
Nationwide Hubcap Chrome trim rings N $51
Subtotal $2,754
State of Oregon Oregon EV Tax Credit (2010 tax year) -$750
IRS Federal EV Tax Credit (2010 tax year) -$2,500
GRAND TOTAL $28,460

As you can see, the total is about $29,000 for the conversion itself before tax credits.  I’ve included title, registration and insurance in the grand total so you can see what they run.   Insurance would be very cheap if not for the special collision coverage amendment that revalues the car to its replacement cost.

My original objectives for the project were: 50 mile range, performance comparable to the original car, no intrusion of the new drivetrain into the trunks or passenger area, stock appearance outside the car, total cost under $30,000, and completion in five months.  Aside from the project taking far longer than I expected, all the other objectives have been met.   “Mission Accomplished”.

Next up: more finishing touches and a “lessons learned” summary.

Pay to: Description Rquired for Conversion? Amount
Spirondon Banos Purchase 1973 Fastback Y $2,900
Rife Motors Remove gasoline engine, fix brakes Y $843
EV Components Batteries, BMS Y $9,034
Electro Automotive Conversion Kit Y $10,025
Fab Shop Fabrication work (includes towing) Y $4,432
Integrity Towing Tow to Fab Shop (1st tow) Y $93
Halsey Import Parts Clutch alignment tool Y $2
NAPA Tool for drive shaft attachment Y $7
RechargeCar Safety power disconnect Y $143
Northwest Battery 12v battery Y $76
Gilbertson Machine Balance flywheel and clutch Y $150
Travis Travelstead Consulting on BMS Y $300
EV Parts “Electric” logo Y $9
Oergon Electric Group Wiring 240v AC outlet for charging Y $575
Schucks Auto Supply Misc parts and tools Y $61
Cableties Inc. Cable ties for battery box covers Y $30
Evolve Inc Replacement BMS boards Y $132
Digikey Extra Molex for BMX Y $30
Winks Hardware Misc parts and tools Y $13
TAP Plastics Battery box covers Y $101
Subtotal $28,956
Chuck Volks Werks Regear transaxle N $525
Peter Parker Purchase of gasoline engine N -$240
AGS Auto Glass Replace windshield N $300
MotorSpot Radial whitewall tires N $709
Progressive Insurance 6 months full coverage N $1,067
State of Oregon Title and registration N $235
Les Schwab Tire mount and balance N $107
Nationwide Hubcap Chrome trim rings N $51
Subtotal $2,754
State of Oregon Oregon EV Tax Credit (2010 tax year) -$750
IRS Federal EV Tx Credit (2010 tax year) -$2,500
GRAND TOTAL $28,460